Our cross-country travels have taught us that a successful RV trip begins long before we pull out of the driveway. These practical RV travel day tips come from traveling thousands of miles as a family and learning how important it is to plan the route, fuel stops, breaks, weather, and campground arrival.
On a recent trip, our first travel day covered 398 miles. We planned the route, packed the RV, and thought we were ready. However, before settling into our campground, we still needed to stop at Walmart for supplies we had forgotten. It was not a major problem, but it reminded us that RV travel days rarely unfold exactly as planned.
Experiences like that have helped us create routines that make our travel days easier and less stressful. Careful planning gives us a strong starting point, while flexibility helps us handle missed turns, forgotten supplies, unexpected delays, and other challenges along the way.
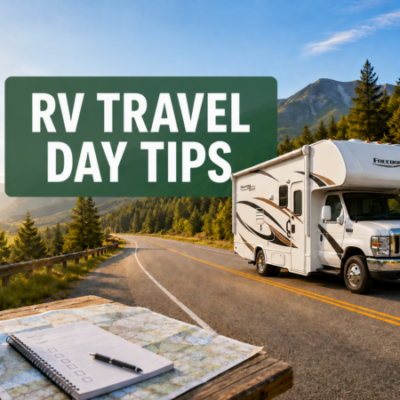
Why RV Travel Days Can Become Stressful
Traveling in an RV is different from taking a road trip in a car. Everything takes a little longer. Fuel stops require more room. Parking options are limited. A quick lunch break may involve finding a location that can accommodate the RV. Even after reaching the campground, you still have to check in, locate the site, level the RV, connect the utilities, and unpack the items that shifted during the drive.
New RVers sometimes assume a smooth travel day means nothing goes wrong. Our experience has taught us something different: a smooth travel day is one where you are prepared to adjust when something does go wrong.
Our Practical RV Travel Day Tips
1. Prepare the RV the Night Before
We try to complete as much packing and preparation as possible before departure morning. Clothes, campground supplies, outdoor gear, and nonperishable food can usually be loaded the night before.
This gives us more time for the safety checks that cannot be completed until we are ready to leave. It also reduces the chance that the excitement or pressure of departure morning will cause us to forget something important.
2. Use Separate Inside and Outside Checklists
The inside and outside of the RV present different risks, so we treat them as separate inspections. Inside, we check cabinets, counters, doors, windows, appliances, and loose items. Outside, we check tires, storage compartments, hookups, awnings, steps, and anything around or beneath the RV.
A written checklist is more dependable than memory, especially at the end of a busy trip when everyone is tired and thinking about the drive home.
Planning your next RV adventure? Download our free RV Adventure Guide and National Parks Checklist to help organize your travels and keep track of the National Park Service locations you visit.
3. Know Your RV’s Height, Length, and Weight
Keep your RV’s important measurements in your phone and somewhere near the driver’s seat. You should know the total height, overall length, and approximate loaded weight of your RV.
Those numbers matter when you encounter a low clearance, narrow road, weight restriction, tight campground, or fuel station that was clearly designed for smaller vehicles.
4. Review the Entire Route, Not Just the Destination
A standard GPS may select a road that is fine for a passenger vehicle but unsuitable for an RV. Before leaving, review the route for low bridges, weight restrictions, steep grades, construction, tolls, and roads where RVs are prohibited.
We also look closely at the final few miles. The approach to a campground can be more complicated than the highway portion of the trip, particularly when the entrance is located on a narrow or busy road.
5. Plan Fuel Stops Before You Need Them
Waiting until the fuel gauge is low creates unnecessary pressure. Not every gas station has enough room for a Class C RV, and it can be difficult to judge the layout from the road.
Identify a few possible fuel stops along the route and begin looking before fuel becomes urgent. Truck stops and larger travel centers are often easier to enter, maneuver through, and exit.

6. Expect the Drive to Take Longer Than the GPS Predicts
The GPS estimate usually does not include slower RV speeds, fuel stops, meals, bathroom breaks, traffic, or the time required to find suitable parking. A drive that appears manageable on a map can become a very long day.
We plan around a realistic arrival window rather than the fastest possible time. That keeps us from feeling as though every stop has put the trip behind schedule.
7. Build Extra Time Into the Day
Extra time provides room for construction, weather, missed turns, supply stops, or a longer-than-expected lunch break. It also gives you the freedom to stop at an overlook or roadside attraction without immediately worrying about the clock.
A schedule with no flexibility can turn a small delay into a stressful afternoon. Whenever possible, we would rather arrive with time to spare than rush through the final hours of the drive.
8. Keep Travel-Day Food and Drinks Accessible
Pack water, snacks, and lunch where they can be reached without unloading half the RV. Having food available helps prevent an unnecessary stop and makes it easier to choose a safe, RV-friendly place to take a break.
This is especially helpful when traveling with children, but adults also make better decisions when they are not hungry, tired, and searching for a restaurant with an oversized parking lot.
9. Check the Weather Along the Entire Route
The weather at home and the weather at the campground may look perfect while difficult conditions are developing somewhere between them. Check the forecast along the route, including expected wind, heavy rain, thunderstorms, heat, or freezing conditions.
An RV is more affected by crosswinds and poor road conditions than a typical car. Changing the departure time or route can be a much better choice than trying to maintain an original plan in unsafe conditions.
10. Confirm Campground Arrival Information
Before leaving, confirm the campground address, check-in time, office hours, gate instructions, site number if assigned, and any directions provided by the campground. Save the phone number in your contacts.
If a delay will push your arrival beyond office hours, call the campground. Staff can often explain the late-arrival process and leave the information you need to find your site.
The Simple System That Works for Us
Most of our RV travel-day routine can be reduced to four steps: prepare early, follow the checklist, leave room for delays, and communicate throughout the day. None of these steps is complicated, but together they remove many of the decisions that create stress.
We continue to adjust our system as our travels change. A weekend trip requires different planning than a 398-mile driving day, and visiting a campground near a major city is different from arriving at a quiet state park. The routine gives us a starting point, while flexibility helps us respond to the actual trip in front of us.
Final Thoughts
RV travel has taught us that preparation matters, but flexibility matters just as much. Checklists, route planning, fuel stops, and campground information help us begin the day with confidence. A willingness to adjust helps when the day inevitably delivers something we did not expect.
If you are preparing for your first RV trip, start with a simple checklist and improve it after every travel day. Write down what you forgot, what caused stress, and what made the day easier. Before long, you will have a travel routine designed around your RV and the way your family travels.
We are still learning on every trip, and that is part of the adventure. The lessons from one travel day often become the tips that make the next one better.