Fall in New England brings colorful leaves, shorter days, and colder nights. For us, it also brings the part of RV ownership we never look forward to: deciding when to winterize your RV and put it away until spring. After a season of campground stays and road trips, closing everything up feels like admitting that camping season is over.
But taking time now helps protect the RV we want to use next year. If you are preparing for your first winter with a camper, the process can feel confusing. Which tanks need draining? Where does the antifreeze go? And what happens if you overlook an outside shower?
This guide walks through a practical antifreeze-based approach for a typical RV plumbing system, followed by the storage checks that deserve attention too. Start with your RV and appliance manuals: valve arrangements, water heaters, and winterization procedures vary by model.
Why empty tanks are only part of the job
Draining your freshwater tank does not necessarily remove water trapped in pipes, valves, the pump, or appliances. Freezing water can expand and damage those components. The challenge is knowing every place water can remain, including fixtures you rarely use.
Your roof, batteries, tires, and interior also need attention before an extended storage period. Think of winter preparation as two jobs: protecting the water system and preparing the rest of the RV to sit unused.
Our New England approach to the end of camping season
Our camping season ends in the fall, and winterizing is part of preparing our RV for the long New England winter. We have used PEAK RV & Marine Antifreeze -50°F and have had good results in our location. That is our experience, rather than a reason every RVer should choose the same product.
Choose a product labeled for RV potable-water plumbing and appropriate for your expected conditions. Follow its label, including dilution instructions. Automotive antifreeze and windshield-washer fluid do not belong in your freshwater system.
The useful lesson for readers is to have a repeatable process. Work through every water outlet and record what you completed, rather than relying on memory when you are ready to close the door for the season.
When should you winterize your RV
Plan around the forecast and your storage conditions, rather than a fixed date on the calendar. Complete winterization before freezing weather can reach unprotected plumbing. An RV stored outside in New England faces different conditions from one in a reliably heated building.
If another fall trip is planned, decide how you will protect the RV between outings. A later reservation does not remove the need to prepare for an earlier freeze. When using the water system again after winterization, follow the required flushing and sanitizing procedures, then winterize again before freezing exposure.
Gather supplies and identify your water system
Before starting, locate your freshwater drain, low-point drains, water-pump winterizing connection, water-heater controls, and bypass valves. Having those locations figured out first makes the work easier to follow.
- Your RV owner’s manual and individual appliance instructions.
- RV antifreeze approved for potable-water plumbing, in the quantity specified for your system.
- The correct tool for your water-heater drain plug or anode rod, if applicable.
- A factory winterizing inlet or compatible pump siphon kit, as required by your RV.
- Gloves, towels, and a list of every fixture and water-fed appliance.
This guide focuses on pumping RV antifreeze through the plumbing. A compressed-air procedure is another option on some RVs, but it requires manufacturer-approved equipment, pressure limits, and steps. Do not assume blowing out the lines also protects drain traps or every appliance.
How to winterize your RV in 10 steps
1. Turn off the water heater and disconnect the water supply
Turn off both electric and propane heating modes and allow the water to cool fully. Disconnect city water and switch off the water pump. Relieve plumbing pressure using the procedure in your manual before opening drains or removing a water-heater plug. Never loosen a plug while the tank is hot or pressurized.
2. Empty and clean the holding tanks
Empty the black and gray tanks at an approved dump station and clean them according to your tank instructions. Drain the freshwater tank as directed. Handle wastewater responsibly and keep your freshwater equipment separate from sewer equipment.
3. Drain the water heater correctly
For a conventional tank-style heater, follow its instructions for safely draining through the drain plug or anode-rod opening. Check a removable anode rod for wear if your heater uses one. Follow the manufacturer’s instructions for the relief valve and final drain-plug position.
Tankless heaters and hydronic systems need their own procedures. Do not apply a tank-style draining or bypass routine to them. Keep the heater off throughout winterization and never energize an empty tank.
4. Drain the lines and handle filters
Open the low-point drains and faucets as directed to release remaining water. Remove, drain, or bypass filter cartridges and housings according to their instructions. Close the low-point drains before pumping antifreeze if your system requires that position. Leaving one open can send antifreeze onto the ground instead of through the fixtures.
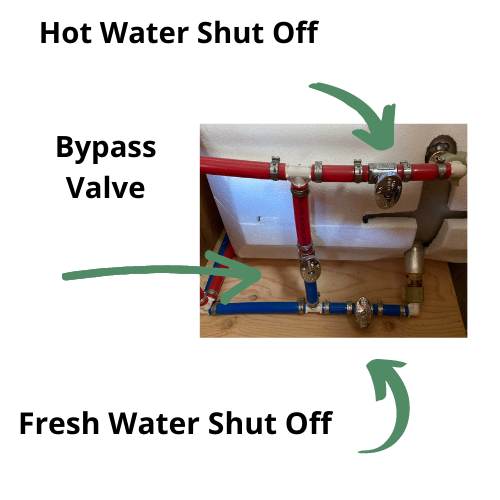
5. Set the water-heater bypass
For a conventional tank-style heater equipped with a bypass, set the valves to route antifreeze around the drained tank. A common three-valve arrangement closes the cold inlet and hot outlet while opening the connecting bypass line. Other layouts differ; use your manual or the diagram on your RV rather than guessing from handle direction.
6. Connect the approved antifreeze supply
Set up the factory winterizing inlet or pump siphon kit as specified for your RV. With a compatible siphon system, the pump draws antifreeze directly from its container. Do not pour antifreeze into the freshwater tank unless your manufacturer explicitly requires that method. Confirm the valves are in the correct winterizing positions before switching on the pump.
7. Protect each hot and cold water line
With the pump operating as directed, open each faucet’s hot and cold sides separately until undiluted antifreeze flows consistently. Close each outlet before moving on. Cover the kitchen, bathroom, indoor shower, and any additional sinks. Watch the antifreeze supply so the container does not run empty halfway through the job.
8. Check toilets and outside fixtures
Operate each toilet until antifreeze reaches its water supply. Include the outside shower, outdoor kitchen, and other water outlets. Treat hot and cold sides separately wherever both are present. A fixture being outside or seldom used makes it easier to miss.
9. Follow separate appliance instructions and protect traps
Check the manuals for washers, dishwashers, ice makers, drinking-water dispensers, and other water-fed equipment. Follow the RV instructions for city-water connections, check valves, tank-flush equipment, and any recirculation lines; running antifreeze at a sink does not prove those separate components are protected.
Add RV antifreeze to each drain trap in the amount specified by the applicable instructions. Protect toilet seals as directed by the toilet manufacturer and wipe away spills to reduce staining.
10. Finish with a documented walk-through
Switch off the pump and secure the winterizing connection, drain openings, and valves in the storage positions specified by your manuals. Confirm every listed fixture and appliance is complete. Record the date, product used, and valve settings so you have a useful reference when preparing for spring.
Prepare the rest of the RV for winter storage
Once the plumbing is protected, take a separate walk-through for storage. Use your RV, chassis, battery, tire, and generator manuals to build a plan for your specific equipment.
- Remove food and items that could freeze, leak, or attract pests. Clean and dry the refrigerator and secure its doors in the recommended storage position.
- Inspect roof seams, windows, and exterior seals. Address leaks before the RV sits through winter weather.
- Choose a battery charging or disconnection plan suited to your battery type. Include the chassis battery on a motorhome; do not assume one charging source maintains every battery.
- Check tire pressures and storage guidance. Include chassis, fuel, and generator storage requirements if your RV has that equipment.
- Inspect periodically for moisture, leaks, pests, and changes in battery condition. Keep required ventilation openings clear.
Common winterization mistakes to avoid
Rushing can leave gaps in an otherwise careful job. The biggest checks are confirming that the heater is safely shut down, the antifreeze supply is connected correctly, and every water-fed component has been addressed. Do not use a generic valve diagram in place of the layout on your RV.
Also avoid treating antifreeze appearing at one faucet as proof that the entire system is protected. A written list of fixtures helps you track the work. If a component or valve is unclear, have an RV service technician explain it before continuing.
Questions before putting the RV away
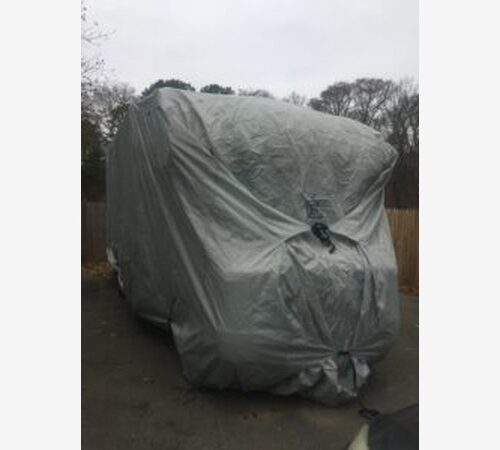
Does an RV cover prevent plumbing from freezing
A cover is not a substitute for winterizing the water system. Choose any cover according to your RV’s storage guidance, and protect the plumbing separately.
How much RV antifreeze will you need
The amount depends on plumbing length, layout, appliances, and the approved procedure. Use your manual’s recommendation and have enough on hand to complete the job. A universal gallon count can leave a larger system unfinished.
Can you do the job yourself
If you understand the system and can follow the manufacturer’s procedure, winterizing may be manageable at home. If the valves, heater, or appliances are unfamiliar, professional help can give you a clear starting point for future seasons.
Get ready for your next camping season
While the RV is parked, you can start planning the trips you want to take next year. Our free RV Adventure Guide and National Parks Checklist includes an arrival checklist to help you build a more organized routine when you return to the campground.
Final thoughts
We would always rather be planning another campground stay than putting the RV away. Still, preparing for a New England winter is part of looking after the RV that carries us on those trips. Give yourself time to winterize your RV, follow the instructions for your equipment, and check the places water can hide before closing up for the season.